'The start of a 365 day journey' - card
#birthday #techniques #patterned paper
Need a birthday card? Well here is a card that quick and easy to make and customise. It is so easy to make that I was able to bunch of them, each of which is slightly different. I'll be showing you four cards I made using slightly different techniques...

These four cards are very similar in style, just slightly different methods used depending on the effect I required. For each card, I used a 5 1/2 x 4 inch notecard as the base. For the background of the card, I used 5 1/4 x 3 3/4 inch piece of patterned paper. The patterned paper I used were all from the brand 'The Craft Stall' from The Reject Shop (you can use any papers you want!). I adhered the pieces of paper to the card using double-sided tape. Now moving onto the different cards...
Pigment inks are great for stamping on any colour cardstock. The ink sits on top of the paper so it doesn't change colour. These are the inks I use on darker coloured cardstock paper. They do take a longer time to dry than some other inks, so be careful not to smudge it! :)

For this card, I used some white pigment ink on some black cardstock. After drying, I cut out the sentiment using a square die. I adhered the sentiment to the card using some foam tape to add some dimension.
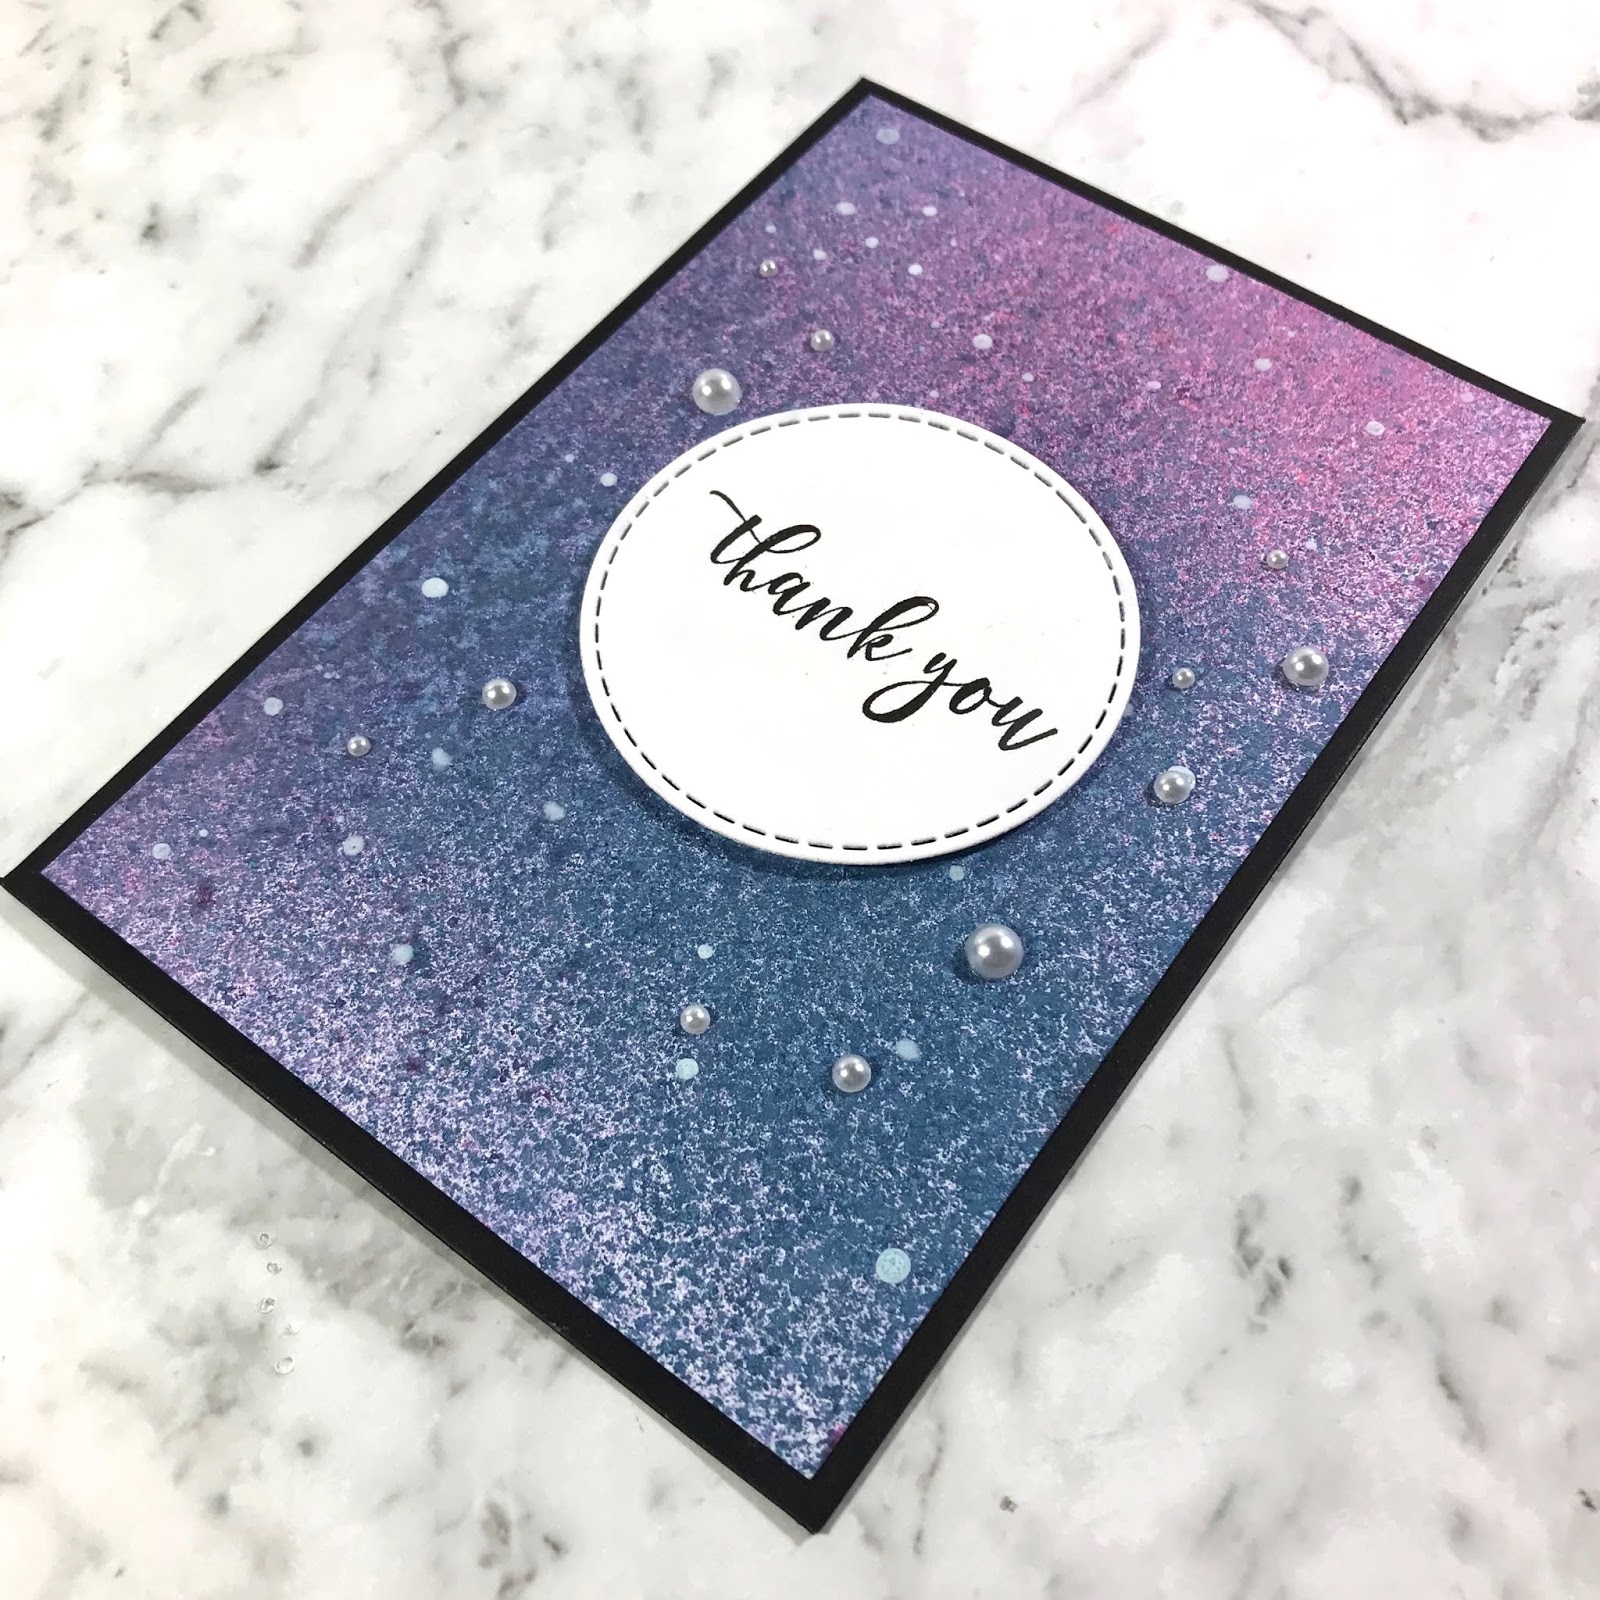
So dye inks are different to pigment inks, these inks absorb into the paper, so the ink will look different on different coloured cardstocks. Since they absorb into the paper they take much less time to dry. I stamp with these inks on lighter coloured cardstock paper, particularly on white.

For this card, I used some purple dye ink on some white cardstock; cut out the sentiment using a square die and adhered the sentiment to the card using some foam tape.
Card #3 - embossing powder
I think this is one of my favourite techniques, but it is a little tricker than just stamping a sentiment. In order to do this, you need to stamp your sentiment using a very sticky ink (a lot of people use Versamark ink, this ink is also great to create watermark effect sentiments). Then you need to pour some embossing powder over the stamped sentiment and tip off the excess. Once you've removed the excess you can use a heat gun to set the powder (heat until the powder melts).

For this particular card, I stamped the sentiment on vellum paper. I used white embossing powder and heat set it, then cut it out using a square die.
Card #4 - foiling
This technique is the most customisable, you can print any sentiment on any cardstock using toner ink (laser printer) and adhere any colour foil onto the ink. I used heat reactive minc foil for this project and a laminator to adhere the foil to the paper (there are a number of great youtube videos showing this method!)

But if you want the same sentiment to foil, I have a cool technique you can use! Disclaimer: You CANNOT sell products that use this technique since it does not use the original product. First, I stamped the sentiment with some black ink onto some white cardstock and stamped it. After it dried, I scanned the sentiment and printed it using a laser printer (toner ink). This sentiment can now be foiled! :)
For this card, I used the same sentiment as the previous cards. I printed the sentiment onto some black cardstock and used some rose gold foil. Then I cut out the sentiment with a square die.
Materials used: Cardstock - black, white (AC) | Patterned paper - The Craft Stall (RS) | Vellum | Inks - Versamark ink, Versafine black pigment ink, Versamagic white chalk ink, Memento ink - grape jelly | Clear stamp - Birthday (KC) | Embossing powder - white (HA), clear (Zing - AC) | Double sided tape | Foam tape
AC - American crafts, RS - The Reject Shop, HA - Hero Arts, KC - Kaisercraft
Here's another photo of all the cards I made along with two bonus cards where I used some Kaisercraft papers and have added a few more details to them. :)

Hope this inspires you to try out some new techniques on your cards! You can them minimal, or go crazy with the embellishments!
Happy papercrafting!
Shanika :)
Need a birthday card? Well here is a card that quick and easy to make and customise. It is so easy to make that I was able to bunch of them, each of which is slightly different. I'll be showing you four cards I made using slightly different techniques...
These four cards are very similar in style, just slightly different methods used depending on the effect I required. For each card, I used a 5 1/2 x 4 inch notecard as the base. For the background of the card, I used 5 1/4 x 3 3/4 inch piece of patterned paper. The patterned paper I used were all from the brand 'The Craft Stall' from The Reject Shop (you can use any papers you want!). I adhered the pieces of paper to the card using double-sided tape. Now moving onto the different cards...
***
Card #1 - pigment ink
For this card, I used some white pigment ink on some black cardstock. After drying, I cut out the sentiment using a square die. I adhered the sentiment to the card using some foam tape to add some dimension.
***
Card #2 - dye inkSo dye inks are different to pigment inks, these inks absorb into the paper, so the ink will look different on different coloured cardstocks. Since they absorb into the paper they take much less time to dry. I stamp with these inks on lighter coloured cardstock paper, particularly on white.

For this card, I used some purple dye ink on some white cardstock; cut out the sentiment using a square die and adhered the sentiment to the card using some foam tape.
***
Card #3 - embossing powder
I think this is one of my favourite techniques, but it is a little tricker than just stamping a sentiment. In order to do this, you need to stamp your sentiment using a very sticky ink (a lot of people use Versamark ink, this ink is also great to create watermark effect sentiments). Then you need to pour some embossing powder over the stamped sentiment and tip off the excess. Once you've removed the excess you can use a heat gun to set the powder (heat until the powder melts).

For this particular card, I stamped the sentiment on vellum paper. I used white embossing powder and heat set it, then cut it out using a square die.
***
Card #4 - foiling
This technique is the most customisable, you can print any sentiment on any cardstock using toner ink (laser printer) and adhere any colour foil onto the ink. I used heat reactive minc foil for this project and a laminator to adhere the foil to the paper (there are a number of great youtube videos showing this method!)

But if you want the same sentiment to foil, I have a cool technique you can use! Disclaimer: You CANNOT sell products that use this technique since it does not use the original product. First, I stamped the sentiment with some black ink onto some white cardstock and stamped it. After it dried, I scanned the sentiment and printed it using a laser printer (toner ink). This sentiment can now be foiled! :)
For this card, I used the same sentiment as the previous cards. I printed the sentiment onto some black cardstock and used some rose gold foil. Then I cut out the sentiment with a square die.
***
Materials used: Cardstock - black, white (AC) | Patterned paper - The Craft Stall (RS) | Vellum | Inks - Versamark ink, Versafine black pigment ink, Versamagic white chalk ink, Memento ink - grape jelly | Clear stamp - Birthday (KC) | Embossing powder - white (HA), clear (Zing - AC) | Double sided tape | Foam tape
AC - American crafts, RS - The Reject Shop, HA - Hero Arts, KC - Kaisercraft
Here's another photo of all the cards I made along with two bonus cards where I used some Kaisercraft papers and have added a few more details to them. :)
Hope this inspires you to try out some new techniques on your cards! You can them minimal, or go crazy with the embellishments!
Happy papercrafting!
Shanika :)


Comments
Post a Comment